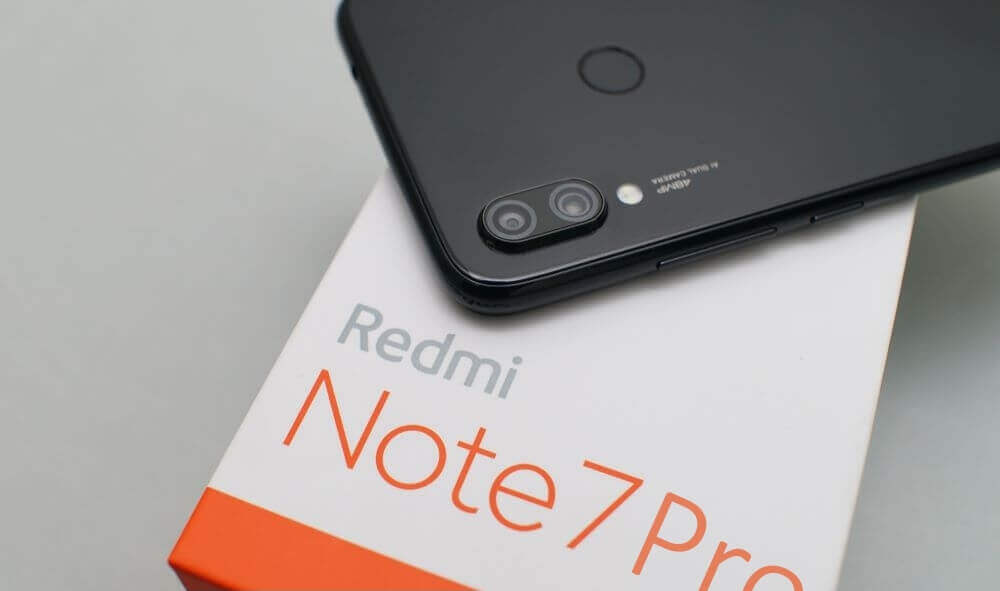
With the success of the Redmi Note Series, Xiaomi’s Redmi Note 7 Pro has a lot of development in the XDA community. Now you can Unlock the Redmi Note 7 Pro Bootloader easily and install TWRP custom recovery within 2 minutes. Just follow the instructions carefully and download the files and drivers on your PC for a smooth operation.
Redmi Note 7 has a massive 6.3-inch full HD+ screen, powered by Qualcomm Snapdragon 675 Processor and comes with two variants of 4GB RAM and 6GB RAM with 64GB and 128GB of internal storage. The massive 4000 mAh battery juices the device throughout the day with casual gaming, surfing, video/audio calling, and watching videos. It also has quick charge 4.0 support and is Splash Proof, which P2i protects.
Unlocking the Redmi Note 7 Pro bootloader will open many doors for exploring the powerful smartphone clocked at 2.0 GHz. You can install any custom recovery and root it with Magisk or SuperSu. Redmi Note 7 Pro bootloader unlock request may take up to 15 days to get approval on the Xiaomi Mi Tool.
Remember, if you unlock the Redmi Note 7 Pro bootloader, you will lose the phone’s warranty. Also, installing custom ROM and custom Kernels may have a high chances of bricking your device if not performed according to instructions provided by the developer. You will be solely responsible for any loss.
Content Table
Unlock the Redmi Note 7 Pro Bootloader
Pre-Requisites
- Charge your mobile up to 50 %
- Take a backup of all your data and contacts. Unlocking the bootloader erases everything.
- Download and install the driver on your Windows PC
-
- Connect your mobile using the USB cable provided in the box to your PC
- Right-click on My Computer and select properties > Device Manager > Search for your Note 7 Pro listed over there
- Now click on Update driver > Browse my computer for driver software > Let me pick from a list of available drivers on my laptop> Click on MTP USB Device and then click on Have Disk > Navigate to the folder of the driver and click open > Click on OK and then restart your computer
- MI Account – The one you used to set up your Redmi Note 7 Pro.
- Enable OEM Unlocking on your device.
-
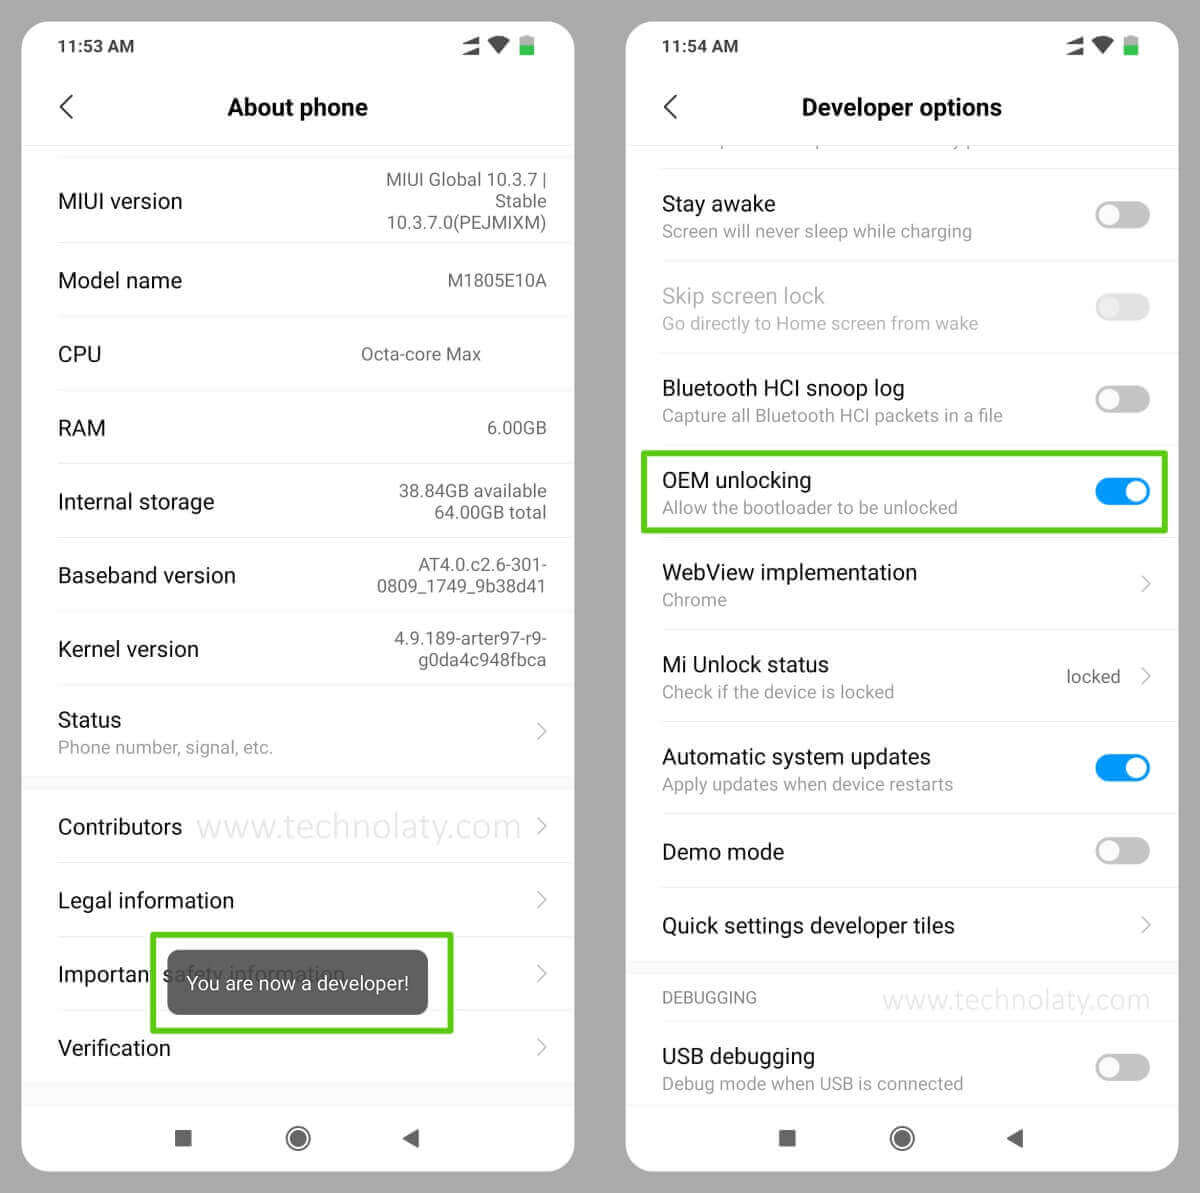
- Go to Settings > About Phone and tap MIUI Version 5-10 times until it shows Developer options enabled.
- Now go back to Settings and click Additional Settings > Developers options.
- Find the OEM unlocking option and tick the button. You will see below that the Mi Unlock status is showing “Locked” now.
Instructions
- Go to the MI Unlock website and download the MI Unlock Tool.
- Turn off your mobile and press the Power button + Volume Down button together for 5-10 seconds until the MI logo is displayed. You will be taken to the fast boot screen.
- Connect your Redmi Note 7 Pro to the computer and open the MI Unlock Tool.
- Log in to your MI Account and click the unlock button on the Application on your computer.
If this is your first time, a message will pop up displaying “Wait for 360 hours” until you can unlock the bootloader of your smartphone. If you applied for the open request 15 days ago, you need to follow the same method from step 3, and then the bootloader will be opened.
To check the bootloader unlock status on your Redmi Note 7 Pro:
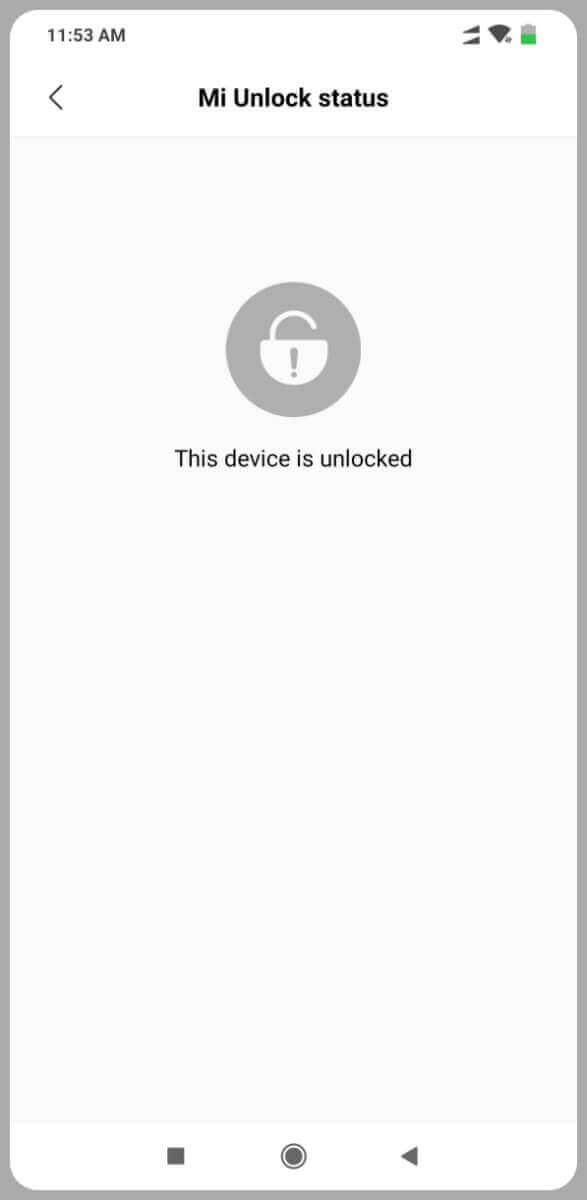
- Go to Settings > About Phone and tap MIUI Version 5-10 times until it shows Developer options enabled.
- Now go back to Settings and click Additional Settings > Developers options.
- Scroll down and click on Mi “Unlock status.” You will see the message “This device is unlocked.”
How To Install TWRP
After you have successfully unlocked the bootloader of your Xiaomi Redmi Note 7 Pro, you can install TWRP on it by following the steps below:
Pre-Requisites
- Charge your smartphone above 50 %
- ADB and Fastboot installed on your computer
- Custom Recovery TWRP/Orange Fox/Peter’s TWRP/ Pitch Black– download any one of them (extract the file and rename it to recovery. img)
Instructions
- Turn off your smartphone and press Volume Down Button + Power Button until you see the Mi logo.
- Now connect it to the computer using the USB data cable
- Go to C: Program Files (x86)Minimal ADB and Fastboot and right-click on cmd-here and run as administrator
- Now type list devices (It will display your device on the ADB and fastboot tool window
- Type fastboot flash recovery recovery. img and hit enter. You will see the write successfully message.
- Now press and hold the Volume Up and Power buttons together to enter the custom recovery mode.
Once you have installed a custom recovery, you can install custom ROMs, kernels, mods, patches, etc., on your device. There are many custom ROMs available officially from various developers. If you plan to upgrade Redmi Note 7 Pro to Android 10, you can install LineageOS.
Conclusion
Congratulations! You’ve unlocked the bootloader and installed TWRP on your Redmi Note 7 Pro. This opens the door to a world of customization and optimization, allowing you to personalize your device to your heart’s content.
FAQs
1. Is bootloader unlocking safe?
Yes, if done following official guidelines. It’s essential to back up your data before proceeding.
2. Can I revert the process?
You can lock the bootloader again, but this will wipe your device.
3. Are there risks involved?
While the process is generally safe, there’s a slight risk of data loss if not backed up.
4. Does TWRP void the warranty?
Yes, installing TWRP may void the warranty. Check with your device manufacturer for details.
5. Can I install custom ROMs with TWRP?
Absolutely! TWRP makes installing custom ROMs easy and enhances your device’s capabilities.
Hello, i followed this guide and lost a month of data. You said “If this is your first time, then a message will pop up displaying to “Wait for 360 hours” until you can unlock the bootloader of your smartphone. If you had already applied for the unlock request 15 days ago, then you need to follow the same method from step 3, and then the bootloader will be unlocked.”
I thought i could just apply for booloader unlocking and do data backup few days later. And bam, after clicking unlock, it started immediately to my surprise? I thought this guide was updated on 7th July 2021… I guess it’s not. I found that the hard way.
In the Pre-requisite part, it is already mentioned “Take a backup of all your data and contacts. Unlocking bootloader erases everything.”