Samsung Galaxy Note 10 Plus is a smartphone worthy of its price. You get a lot of features that are required by a premium flagship device. If you are searching for how to install TWRP on the Samsung Galaxy Note 10 Plus, you have landed at the right place; we will guide you through the entire required process.
The bootloader must be unlocked and rooted to install TWRP on the Samsung Galaxy Note 10 Plus, or you might be bricking your device. Once the custom recovery is installed on your phone, KNOX will be triggered, meaning your warranty will be voided, and specific applications that use KNOX, such as Samsung Pay, Secure Folder, etc., may not work. However, it depends from country to country, and Samsung still provides the hardware warranty regardless of the software.
Remember that the OTA updates will not work anymore once you install TWRP on the Samsung Galaxy Note 10 Plus. However, you can install the updates through the TWRP recovery if a developer patches the update.

Content Table
What Is TWRP Recovery
TWRP, or TeamWin Recovery Project, is a custom recovery that is the gateway for installing custom ROMs, custom kernels, Android patches, mods, etc. Once TWRP is booted, you cannot access the device’s operating system; you can even access the files and transfer them to your computer using the USB data cable.
Exynos Only: In no way is it compatible with Snapdragon variants but not limited to American(U/A/T/P/V), Chinese(0/8/6), Hong Kong(0), Japanese(SC-*), Canadian(W) variants.
Install TWRP if you have Exynos variants – N970/971/975/976/N/F/B.
Instructions
- Please turn off your device and reboot to download mode by pressing the Volume up + Volume down buttons and connecting it to the computer using a USB Data Cable.
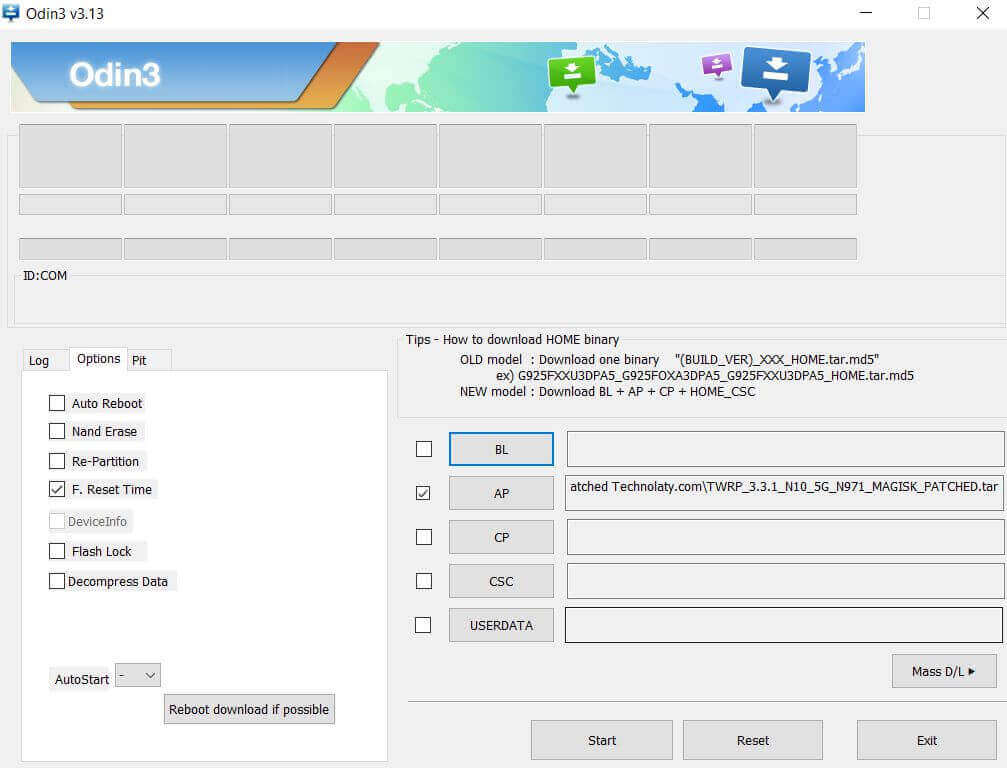
- Open the extracted Odin folder and run Odin.exe as administrator on your computer.
- Now, on the AP tab, select the TWRP_3.3.1_N10_XX_XXXX.tar (whichever model you have and downloaded)
- On Odin > options tab, check Auto-Reboot.

- Now click the Start button and let the process complete until you see the PASS sign-on, Odin.
- Once your device reboots to TWRP recovery, go to Install and navigate the Note_10_Multidisabler_v3_2 file and swipe to Flash. (Make sure you uncheck Reboot automatically).
- Now, in the TWRP menu, tap on Reboot and reboot to recovery.
- Go to WIPE, select Format Data > type YES, and swipe to format.
- Reboot your phone and enjoy.
Snapdragon
Snapdragon Only: Flash the following TWRP on Samsung Galaxy Note 10, and if you have SM-N9750/N9700.
Instructions
- Please turn off your device and reboot to download mode by pressing the Volume up + Volume down buttons and connecting it to the computer using a USB Data Cable.
- Run Odin.exe as administrator on your computer and untick the auto-reboot function.
- Now, on the AP tab, select the TWRP_N9700_3.3.1-6.tar or TWRP_N9750_3.3.1-6.tar.
- Flash it, and do not boot into the System immediately.
- Boot to TWRP and check if the SD card is visible or not. If you cannot see then format the data from the TWRP menu. Go to Wipe > Format Data.
- Reboot to the System now.